connect + share.

      twitter  follow in feedly  Joss and Main :
Showing posts with label halloween. Show all posts

Friday, September 5, 2014

diy: black and white velvet pumpkins.

[easy diy velvet pumpkins and pillow cover].
Happy Fall, friends!

I don't know about you, but I simply couldn't wait for Fall to arrive.

Even though Fall doesn't officially start till the Autumnal Equinox on September 23, for me the first of September is my signal to start thinking about jeans tucked into boots. vests over turtlenecks.  cool days followed by cozy nights under a blanket.  my first pumpkin spice latte of the year.  yummm.

And of course velvet pumpkins!

A couple of years ago, I created a ton of oh-so-easy velvet pumpkins [click here for the detailed tutorial]. I made them in delicious colors like silvery-blue, deep olive, champagne, burnt orange, and rich chocolate brown.
[the original batch of velvet pumpkins].
I still adore that first batch, and you bet your knee-high boots I already brought them out and scattered them around the house. But this year I wanted to create a black and white Halloween vignette so I whipped up some black and white pumpkins using crushed velvet from Joann's and real pumpkin stems I've been hoarding since last year's [real] pumpkins hit the compost heap.

[easy diy velvet pumpkins and pillow cover].
Did you spy that delightful skull pillow in the back? I made that easy-sew pillow cover with some black and white skull fabric [also from Joann's!]
Pillow covers are a super-simple, inexpensive way to change out your decor for the seasons. If you want to make your own, here's the detailed tutorial including measurements.
[easy diy velvet pumpkins and pillow cover].

Thanks as always for reading, friends!  Here's to another wonderful Fall season!

Please let me know in the Comments below if you have any questions and I'll happily answer them if I can.


twitter follow in feedly Joss and Main :

Wednesday, September 4, 2013

halloween diy - containing the eek!

this halloween decoration idea couldn't be simpler! more simple? the simplest.

my project was inspired by this great Better Homes and Gardens idea.

first gather yon supplies:
[3] footed hurricanes
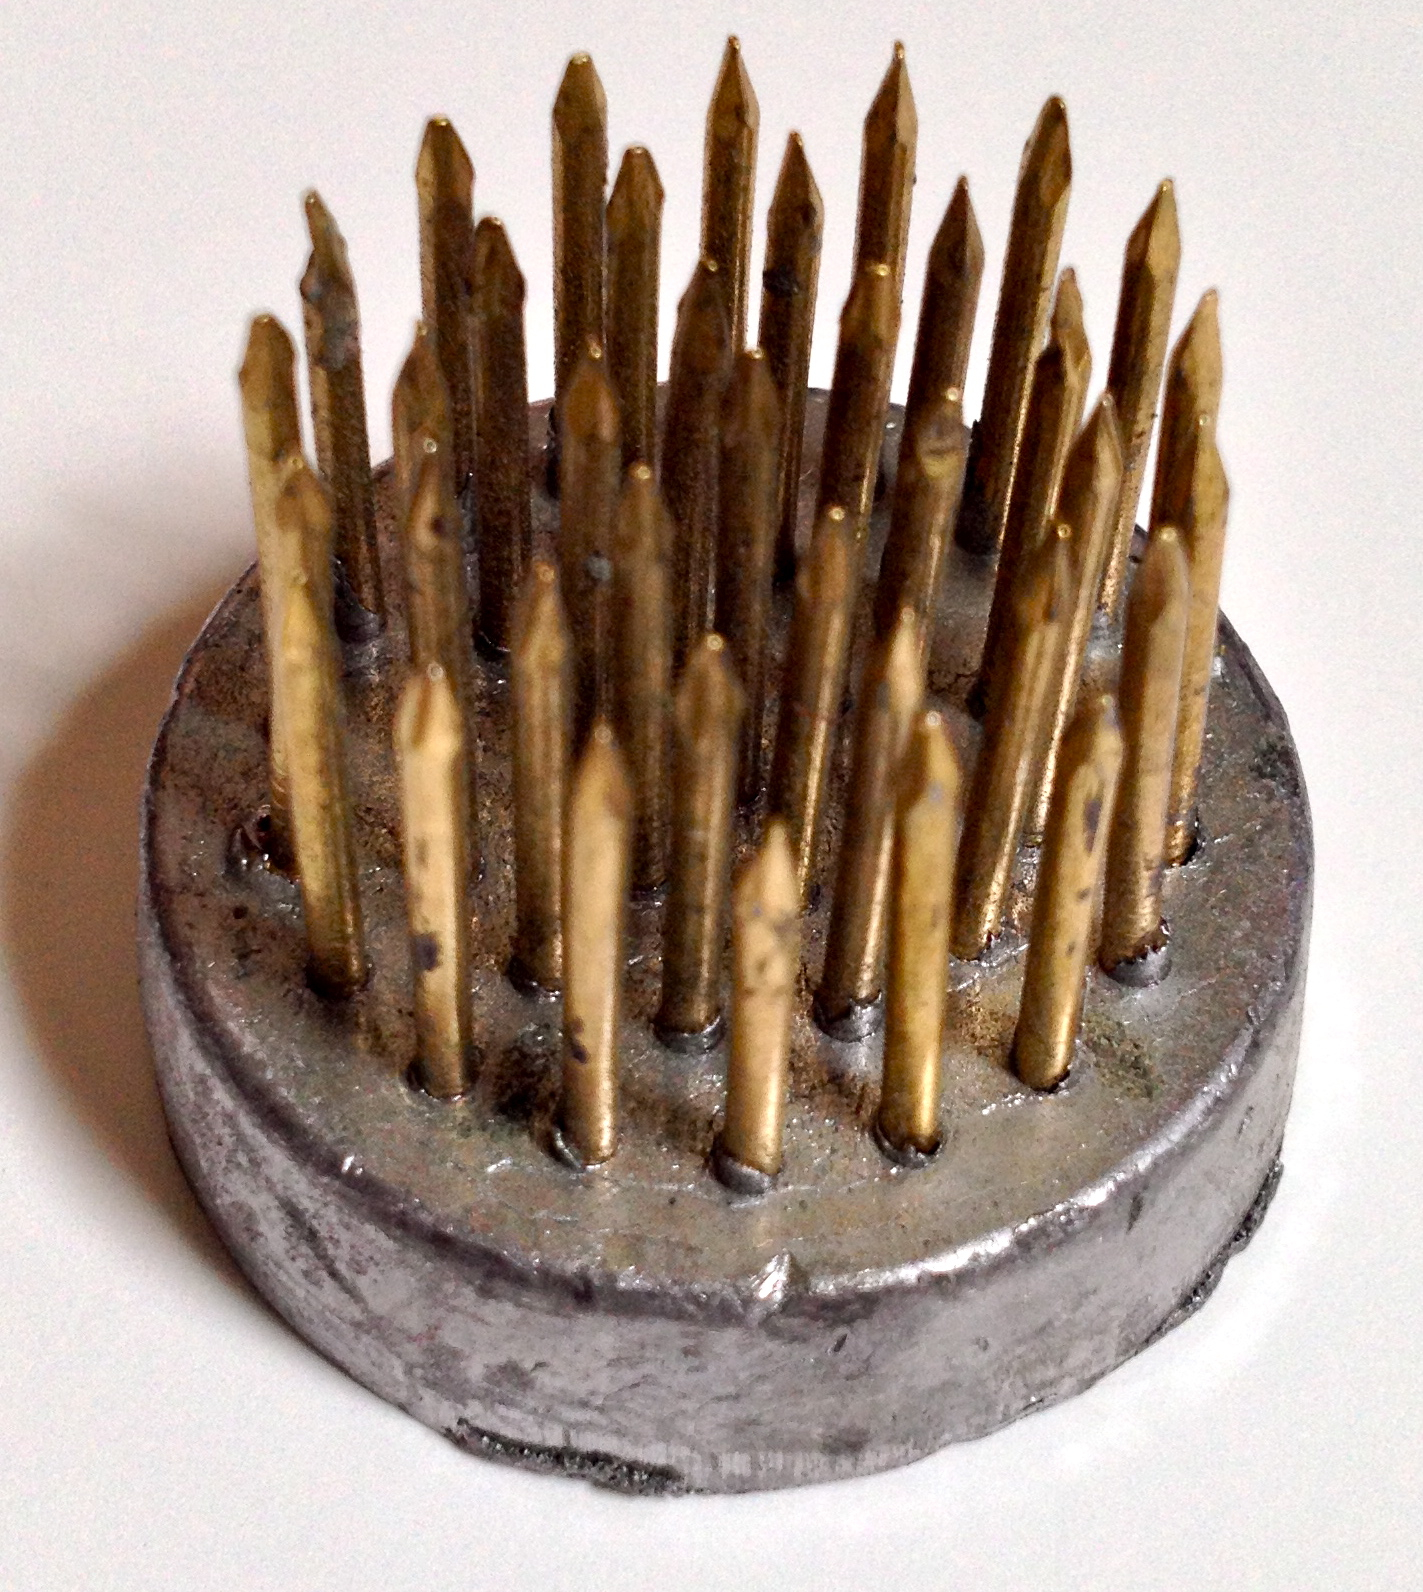
[3] flower frogs*
[3] pieces of pearly white cardstock, each printed with a single letter
[1] package dried moss
[assorted] decor to place around the hurricanes

*take a moment or 10 to stare into space and wonder why that thing is called a flower frog.
give up and keep moving.
[flower frog].
I scored my footed hurricanes at a ridiculous clearance price at Michael's but you can buy them at nearly any crafts store or the wonderful HomeGoods. flower frogs  and moss were also from  Michael's, in the floral supply aisle.

gently break the moss into the desired size and place it in the bottom of the hurricanes.
slot each letter into it's flower frog. try again to figure out why it's called a frog.

shake the cobwebs from your brain [or place them in the hurricane! it's Halloween after all] and lower each letter into the hurricane.

wonder how your nice table got those scratches. probably because you're always plopping stuff on it to take pictures.

add desired decor around the feet. I placed some multi-color ceramic pumpkins and amber beaded garland.  I tucked a silver skeleton statue behind and I was done!

it's a simple vignette with lots of layers and texture.

twitter follow in feedly Joss and Main :

Monday, August 19, 2013

halloween diy - spooky chandelier on canvas.

who's getting fired up for Halloween besides me?

a little rooting around in my unused Halloween decorations unearthed a vinyl chandelier wall decal. it's been rolled up in a tube for a couple of years so I finally decided to do a little somethin' somethin' with it.

a little more rooting and I discovered an old artist canvas that I bought on clearance and never used.

eureka!

a match made in heaven.
[spooky + lovely halloween canvas].
out came my never-ending wee sample can of Benjamin Moore Oxford Gray.
I swear this is going to be all over my house and yet the can will never be empty!

using my super-lazy super-easy dry-brush technique [does she ever do anything else?!] I quickly brushed the paint on the canvas, leaving some of the original white showing through for contrast.
[canvas paint prep].
after the paint dried, I used a craft spray adhesive on the back side of my chandelier and placed it on the canvas, then laid a piece of parchment paper on top to protect it.

next came a stack of heavy hardback books [Dick Francis to the rescue, hooray!] to help with the adhering process.
[dick francis to the rescue! helping with adhesive].
it was so tempting to keep peeking at the canvas to see if the chandelier adhered, but I was good reasonably good at leaving it alone to do it's thing.

success!

out came some thick craft wire, a fuzzy spider [eek!], and an upholstery tack. I nailed the tack to the top of the canvas, wrapped the wire around it, then did my favorite twist-around-the-pencil trick on the wire  so I ended up with a coil throughout.  wrapped the other end around the spider...
[adding the spider with coiled wire].
and voila!
[the finished product again].
it's possible that I'll be able to wait till at least mid-September to put this lovely scene on the mantel.

no promises!

twitter follow in feedly Joss and Main :

Thursday, November 8, 2012

lovely, easy velvet pumpkins.

are you as obsessed with velvet pumpkins as I am? well, it's very easy [and inexpensive!] to make your own...bonus is that you get to pick your very favorite colors and make any size you want.

step #1: choose your material.
I purchased crushed polyester velvet. I prefer it over silk velvet because no silkworms have to die to make it, and it's about 1/4 of the price. shazam!
I chose a deep olive, silvery-blue [double yum, my fave], creamy champagne, a deep dark chocolate, and rich burnt orange.

step #2: root around your house to find something round that approximates the size you want. 
remember that your finished pumpkin will be about 1/2 the size of the fabric circle that you cut, because you're going to gather up the ends and sew them at the top, effectively halving it's size.

the biggest circle in my house is a plastic bowl that's about 11.5 inches across so I used that, placing it on the back side of my fabric and tracing around it.
but I wanted my fabric circle to be a bit bigger so when I actually cut the fabric, I used my traced circle as a guide and cut an inch or so outside the tracing, making my final cut circle about 14 inches.


step #3: sew a really easy running stitch.
hand sew a running stitch all the way around your fabric, leaving long tails at each end so that you can tie it off.  I inexplicably have a lot of embroidery floss [why in the world? I don't embroider] so I used that to do my stitches. it's strong and I need to get rid of it.

your stitches definitely don't have to be perfect, believe me mine weren't!
the smaller and closer your stitches are to each other, the more pleats your pumpkin will have.


step #4: fill.

place a good amount of beans in the bottom, enough to weight the pumpkin and give it balance on it's bottom.
cram polyester fiberfill in, filling it all the way.
remember those ends we left nice and long? grab those puppies and tie a really tight knot. if you're like me and you don't have 3 hands, enlist some help to tie that final knot because the stuffing's going to be pushing back at you! cheeky stuffing.
trim off the excess ends of the string.

step #5: hot glue the stem on top.

for me, this was the hardest part, not because it's difficult to actually accomplish, but because I forgot to save my pumpkin stems from last year. duh.
so I cut some stems off this year's pumpkins. remember later on when you're composting your pumpkins: cut those stems off and hoard them!
don't be shy with the hot glue...really load it all over the base of the stem.
once you've got your stem all nice and gluey, press it down hard on the top of the pumpkin, holding for about a minute.

once again, here they are in all their glory! each of these took me less than 15 minutes.
and they look so lovely all piled on the dining room table.


twitter follow in feedly Joss and Main :

Tuesday, October 19, 2010

don't get scared now: halloween earrings.

I bought the skulls to go in the middle of my Halloween cobweb + flower brooches but they were too small so I made some Halloween earrings instead! tied a little of the leftover cobweb fabric at the top for a hint of girly glam.
[skull earrings for halloween].

twitter follow in feedly Joss and Main :

Sunday, September 12, 2010

lovely + a little spooky halloween wreath.

halloween was always a fun holiday for me as a kid. we lived in what is now a truly frightening part of Los Angeles. but back then, in the 1970s, it was safe for just the kids [no adults allowed!] to go out by ourselves. armed with a ratty old pillowcase to collect our loot, we'd run through the neighborhood, making stops back at home base to unload the haul. then we'd race out again.

now that I'm an adult I still love halloween, even if it doesn't hold the thrilling terrors it used to. though now I see it as a great excuse to decorate the house. last year, I had this idea of making a black wreath and I finally did it yesterday.
[the fixins].
the house next door to us in the old neighborhood was widely considered to be haunted, as it inexplicably sat pretty far back on its lot, with a lot of huge old trees in front of it. I can just picture this wreath hanging on their front door. except it would have real skulls on it of course.  brrr.
[in the sun so you can see the furry spider-leg on the cobweb fabric; gross and fun!].

supplies:
[1] medium sized grapevine wreath
[1 pkg] soft plastic skulls from Michaels [or any craft store]
[1 can] black spray paint
[1] floral stem of purple cloth flowers
[a few strands of] scrap fabric
[way less than 1 roll] floral wire or craft wire


destructions:
1. spray the grapevine wreath with black spray paint
2. wrap scrap fabric loosely around the wreath, tucking it in and around the branches to secure it
3. cut flowers off the the floral stem and tuck into the wreath where desired
4. poke the wire through back of skulls and twist ends around wreath stems to secure
5. if desired, take another piece of scrap fabric and tie it around the top to use as a hanging device


this wreath project was a lot of fun. I toyed with the idea of putting glitter on the skulls but decided against it. they're just wired on so I can always remove them and add the glitter if I change my mind. for now, I kind of like their multi-colored bony shades.
[close up].
[spooky].
counting the days till october 1st so I can hang it on the front porch.
twitter follow in feedly Joss and Main :

Thursday, July 29, 2010

cobweb brooch (no. 1 & no. 2) to celebrate Halloween.

I know it's only the end of July, but here in Portland that's when the light starts to change ever so slightly & Fall begins to show herself. And I start to think of Halloween. I don't know when it became such an enjoyable holiday for me, except that we've spent the last couple of them visiting family in Boulder and that's been such a treat [pun intended].  So here we go...


a twist on both the lovely brooch and a Halloween item... the flower is handmade from two rich purple Halloween fabrics, mounted on a semi-sheer purple cobweb fabric and finished with purple pearlescent beads. I wear mine as an accessory to my witch costume, and also just everyday to celebrate the season.
(no. 1)

and another...
(no. 2)

twitter follow in feedly Joss and Main :
Related Posts Plugin for WordPress, Blogger...